In this article, you can:
💡Skip the steps and use this shortcut to send us your file.
Before you get started, know that uploading your clients to SalonInteractive is secure. We do not share your client list with anyone, including brands or distributors.
To upload your list, log in to SalonInteractive. In your menu, go to Clients and then Add clients.
Connect POS to sync clients
If you use Rosy, Square, Envision, or Inspire salon software, consider connecting your account to SalonInteractive. Connecting your software eliminates the need to upload clients, as they will automatically sync with your SalonInteractive account.
To connect your software, click Connect POS and follow the prompts.
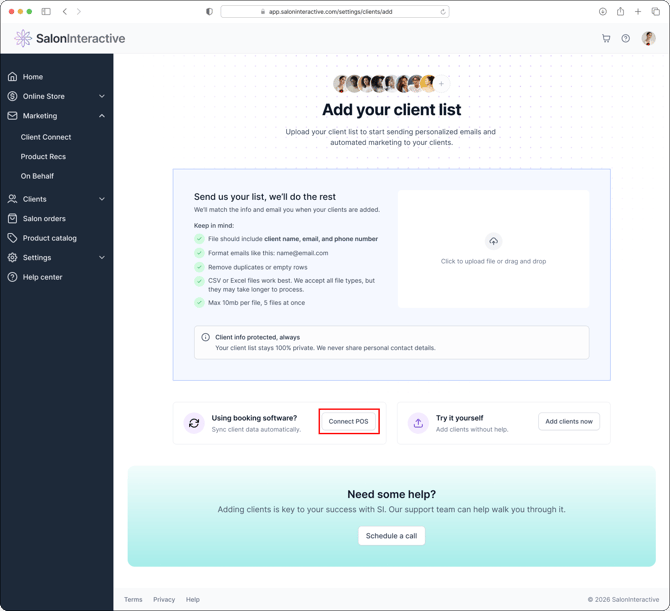
The other option is to upload your client list as a CSV file.
How do I create or edit a CSV file for my client list?
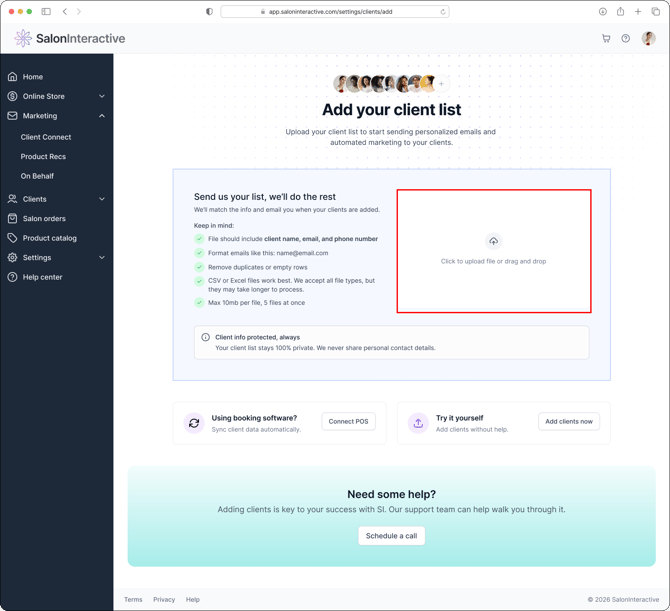
Let us upload clients for you
💡Skip the steps and use this shortcut to send us your file.
If you would like SalonInteractive to upload your clients for you, either click to upload your file or drag and drop it here. You can upload up to 10MB max per file, 5 files at once.
On the next page, you can upload a list by dragging and dropping the file onto the upload box or clicking the Browse button.
Click Upload files.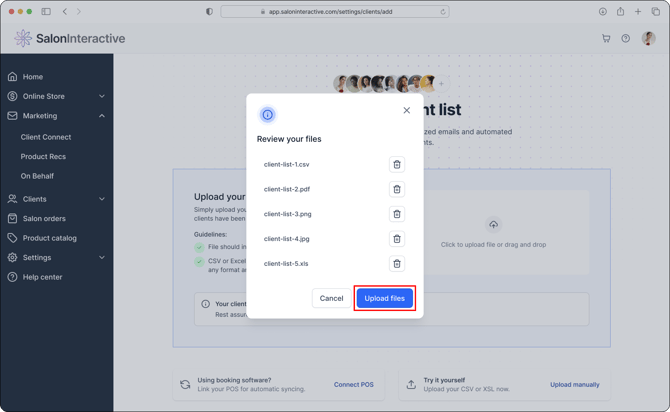
Double-check that the files are correct and remove any that are not relevant. Then, click Upload now to place your file(s) in the queue for our team to upload. We will add your clients within 1-2 business days and email you as soon as it’s done. Click Next.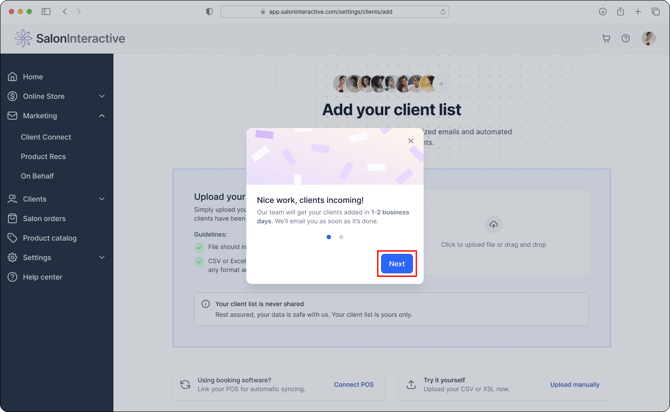
If you would like SalonInteractive to send a welcome email with your Online Store link when new clients are added, click Send welcome emails for me. 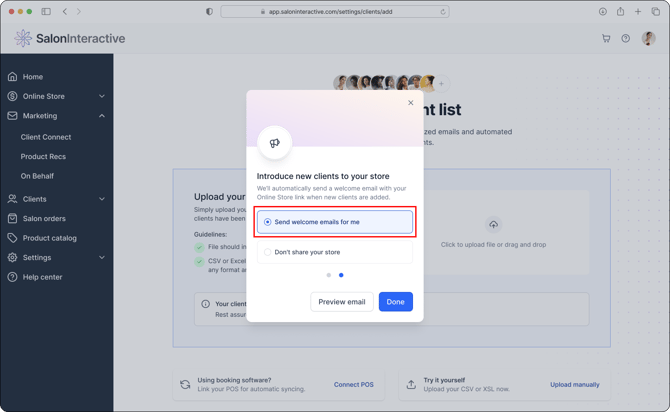
If you’d like to see how the email looks, click Preview email. Otherwise, click Done.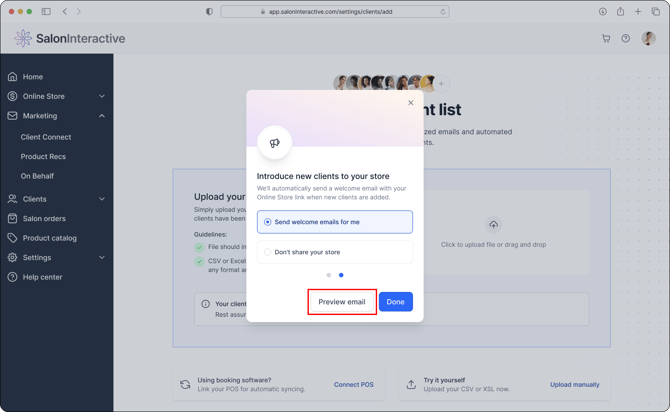
Upload clients yourself
If you’d like to upload your client list yourself, click Add clients now.

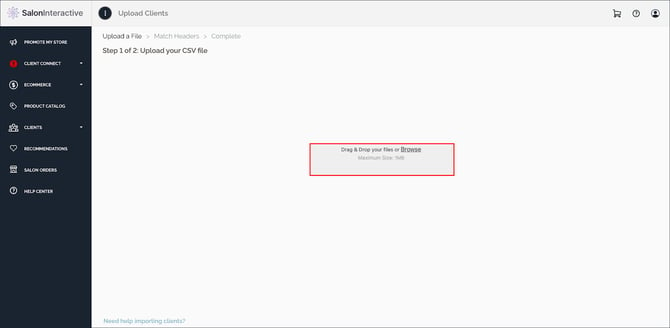
On the next page, you can upload a list by dragging and dropping the file onto the upload box or clicking the Browse button.
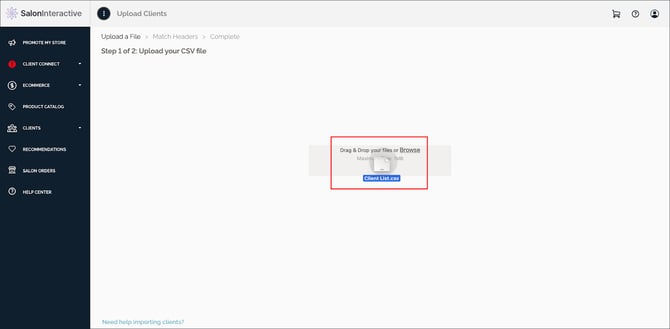
Click the upload icon to continue the upload process.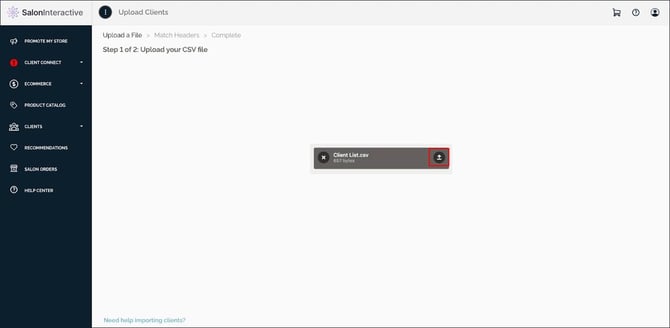
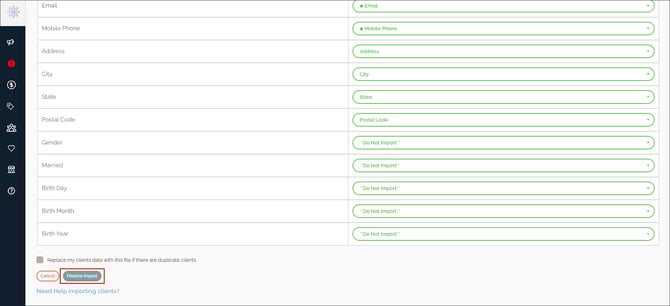
Once your list is uploaded, you’ll find the Match Headers page. Here, you want to match up your file’s column headers shown on the left to the ones available on the platform on the right. Anything not matched up will not import. At the very least, you must match First Name, Last Name, and Email to finalize your import.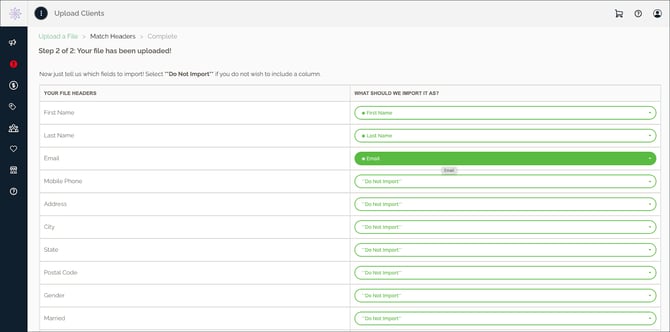
If, for any reason, you need help at this stage, simply click the Need Help Importing Clients link at the bottom of this page.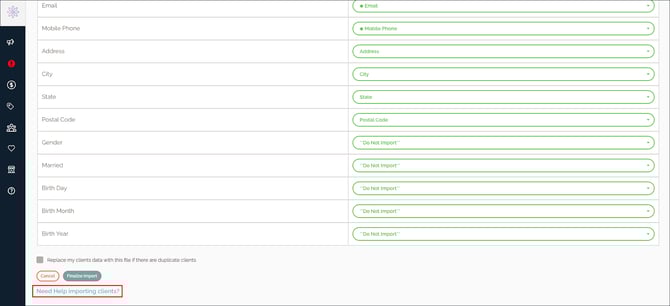
If you want the list you are uploading now to replace your current client data on the platform, click the checkbox. Otherwise, leave the box blank and click Finalize Import.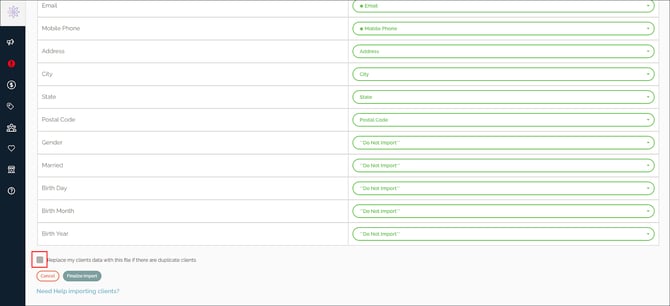
Now that your clients have been uploaded to your Online Store, you can send Product Recommendations and use SalonInteractive’s email marketing tools.
💡Skip the steps and use this shortcut to send us your file.
Resources:
- How to Connect Your POS Software
- How do I create or edit a CSV file for my client list?
- How do I add tags?
- How do I manage clients?
- How do I make Product Recommendations?
- What is the SalonInteractive mobile app, and how do I use it?
- What is On Behalf Marketing and how does it work?
- How do I create & send email campaigns?
- What are email automations?
If you need help, we’re here for you. Give us a call at 312-300-0553 or open a case at support@saloninteractive.com.